For fields such as "Description" we will need to enable rich text format.
Default ES, only supports raw text for any field.
Below I have mentioned how to enable RTF for ES input fields with HTM and asset extensions.
01. goto <ES_HOME>/repository/deployment/server/jaggeryapps/publisher/extensions/assets/gadget/themes/default/partials and copy below content to a file with the name default_table.hbs into this location.
02. Now create a gadget and add below HTML content for the input field of its "Description".
Note that with above extension RTF will be available for all the fields of an asset of this type.
Read more on ES extension model here[1]
[1] https://docs.wso2.com/display/ES200/Working+with+the+ES+Extension+Model
Read More
Default ES, only supports raw text for any field.
Below I have mentioned how to enable RTF for ES input fields with HTM and asset extensions.
01. goto <ES_HOME>/repository/deployment/server/jaggeryapps/publisher/extensions/assets/gadget/themes/default/partials and copy below content to a file with the name default_table.hbs into this location.
<h2 class="field-title">Here, you can see that I have used triple mustaches to unescape html in the field value.(compare with <ES_HOME>/repository/deployment/server/jaggeryapps/publisher/themes/default/partials/default_table.hbs)
<a data-toggle="collapse" href="#collapse{{label}}" aria-expanded="false" class="collapsing-h2" >
<i class="cu-btn-exp-col btn-collapsed">{{label}}</i>
</a>
</h2>
<div class="collapse in" id="collapse{{label}}">
{{#eachField this.fields}}
<div class="row padding-bottom-lg">
<div class="col-sm-2 text-right">{{label}}</div>
<div class="col-sm-10">{{{value}}}</div>
</div>
{{/eachField}}
</div>
02. Now create a gadget and add below HTML content for the input field of its "Description".
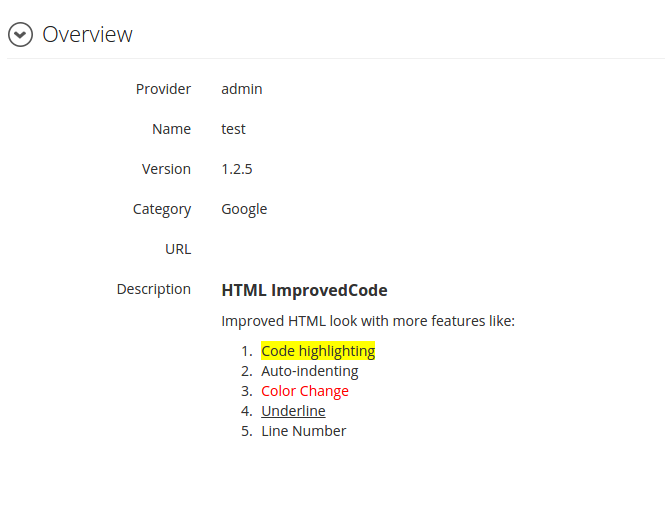
<p><strong><span style="font-size: medium;">HTML ImprovedCode</span></strong></p>03. When you view this asset you can see the content of "Description" nicely in RTF as in bellow image.
<p>Improved HTML look with more features like:</p>
<ol>
<li><span style="background-color: #ffff00;">Code highlighting</span></li>
<li>Auto-indenting</li>
<li><span style="color: #ff0000;">Color Change</span></li>
<li><span style="text-decoration: underline;">Underline</span></li>
<li>Line Number</li>
</ol>
<p style="text-align: left;"> </p>
Note that with above extension RTF will be available for all the fields of an asset of this type.
Read more on ES extension model here[1]
[1] https://docs.wso2.com/display/ES200/Working+with+the+ES+Extension+Model