Showing posts with label Store. Show all posts

Monday, May 9, 2016

WSO2GREG-5.1.0 Store Extension Model


WSO2GREG-5.0.0 onwards, Store is build on top of WSO2 Enterprise Store code base. It has extension capabilities which are defined in https://docs.wso2.com/display/ES200/Working+with+the+ES+Extension+Model
There is a small deviation from above documentation when it is applied to Governance Center since some of the original Store code components mentioned in above documentation has been already overridden in Governance Center. However the pattern is similar as in the above documentation.
Below Image Explains the directory structure of expendable components for Governance Center-Store customizations.


  1. Asset extensions are available in this [GREG_HOME]/repository/deployment/server/jaggeryapps/store/extensions/assets/ location
  2. All the app extensions are organized in this folder [GREG_HOME]/repository/deployment/server/jaggeryapps/store/extensions/app/.
    1. Working with App extensions are described in https://docs.wso2.com/display/ES200/Introduction+to+App+Extensions
  3. You can add a new folder here to add a new app extension following the guide https://docs.wso2.com/display/ES200/Creating+the+Shell+of+an+App+Extension
  4. The default behaviour of asset types is defined here [GREG_HOME]/repository/deployment/server/jaggeryapps/store/extensions/assets/default
    1. https://docs.wso2.com/display/ES200/Introduction+to+Asset+Extensions
  5. All the default UI components are organized in this [GREG_HOME]/repository/deployment/server/jaggeryapps/store/themes/store folder.
  6. In GREG Store this [GREG_HOME]/repository/deployment/server/jaggeryapps/store/extensions/app/greg-store-defaults directory is used to override behaviour in 4. And 5. as a special case.
  7. We use the RXT shortname as defined in the definition. You may add a new asset extension with the singular name of RXT type to override the default behaviour 4, 5 and 6 by following the guide https://docs.wso2.com/display/ES200/Creating+the+Shell+of+an+Asset+Extension
    1. Here the priority will be given in the order of (7) >> (6) >> (5+4)
  8. This [GREG_HOME]/repository/deployment/server/jaggeryapps/store/extensions/assets/restservice is a sample of out of the box available asset extension.
Read More

Monday, April 11, 2016

WSO2GREG-5.2.0- Writing extension to replicate more artifact metadata in Store

As of the default behavior in we only show selected set of metadata of a given asset instance in the Store. But there are requirements of showing all the metadata/fields of an asset instance in the Store. In this post I am going to explain how to achieve this with GREG-5.2.0 extensions.

For this example scenario, I am going to explain how to extend restservice asset type to show its all the artifact fields.

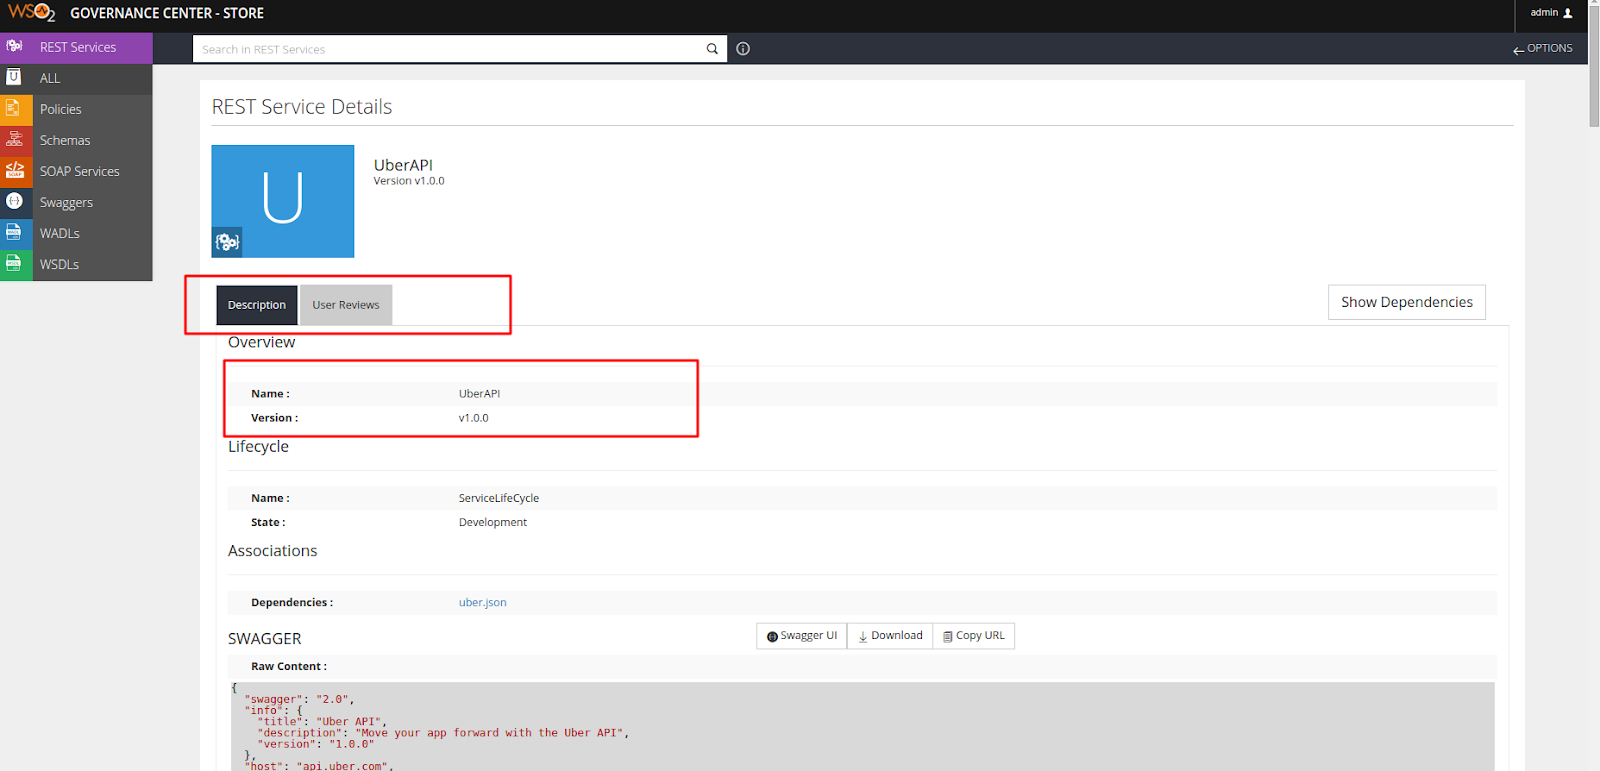
old_ui.png

As shown in above image we have only two tabs Description and User Reviews.

pub-ui.png

But, when we consider Publisher there are several tables which contains metadata information related to an asset instance.

In this example, I will use tabs in Store details page to map tables in the rxt of the restservice.

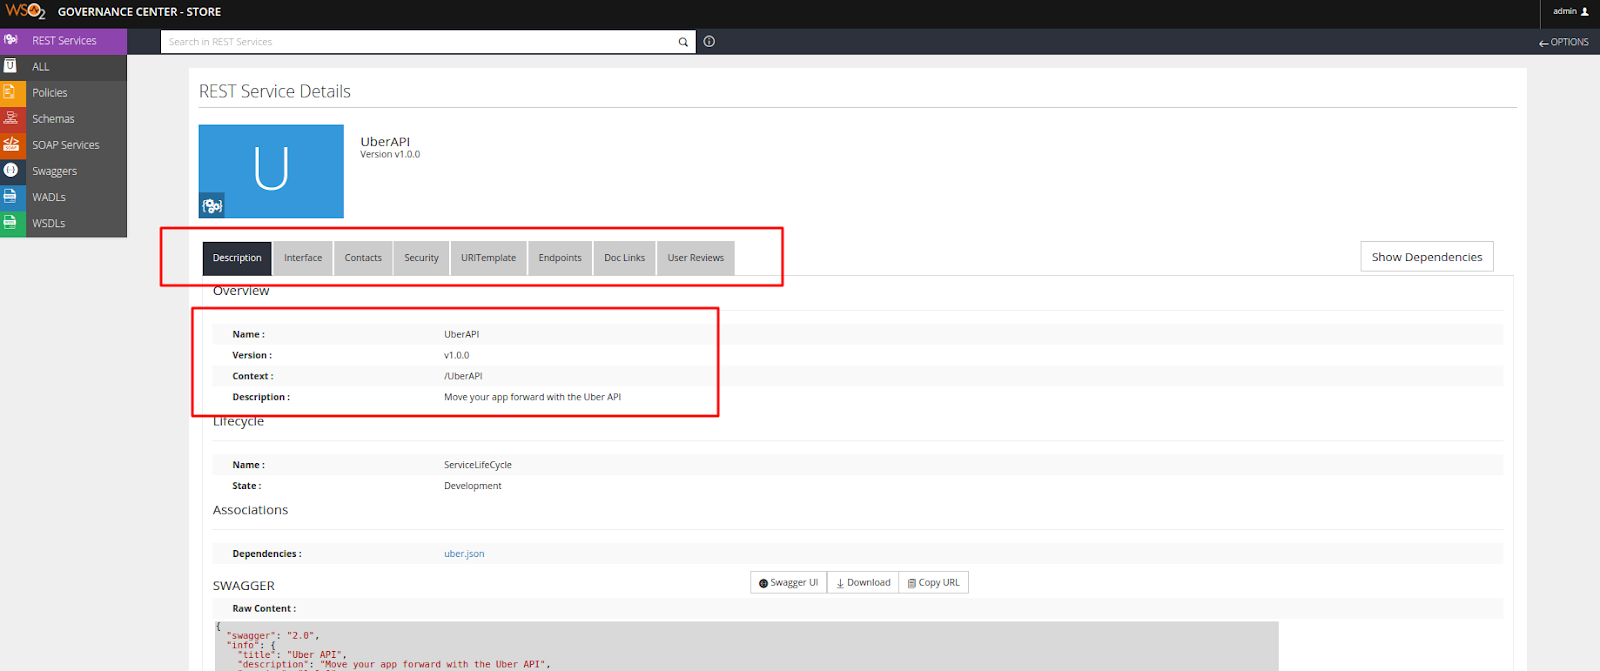
new_Api.png

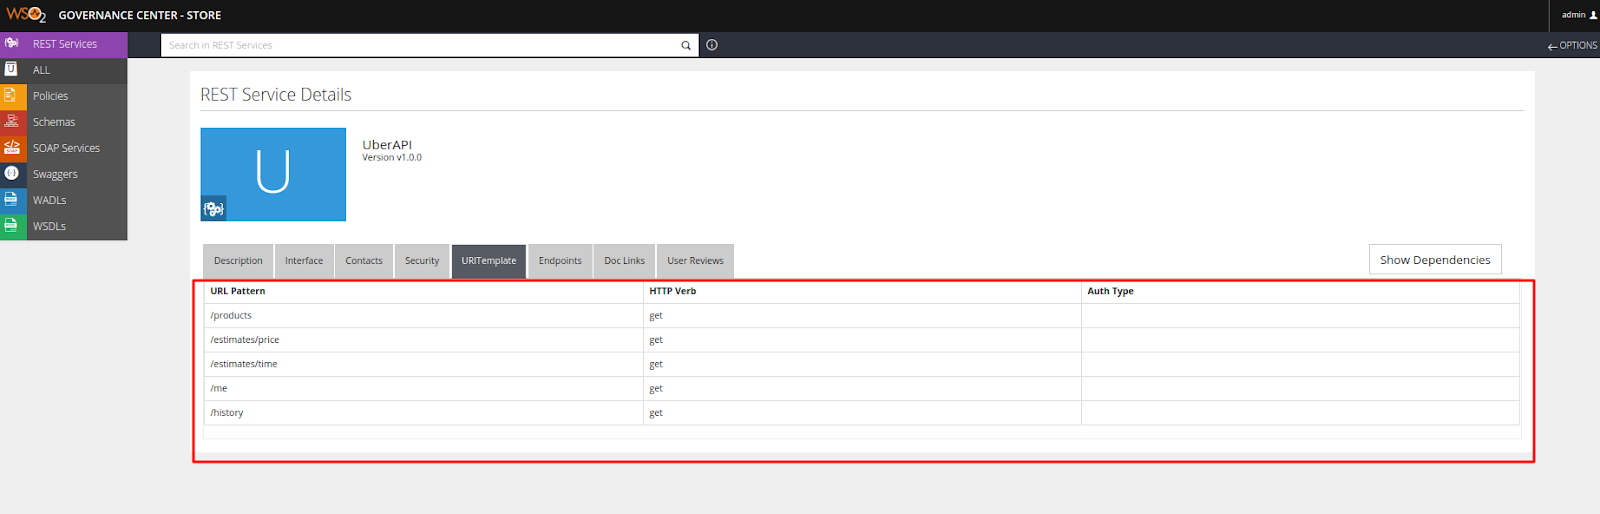
After adding extensions Store Rest service details page will look like above. Each of the tab will correspond to a table in rxt and will contain the details of that particular table when selected.

Screenshot (1).png

Follow, below steps in-order to implement this extension.

  1. Add below pageDecorator to [GREG_HOME]/repository/deployment/server/jaggeryapps/store/extensions/assets/restservice/asset.js
assetCombinedWithRXT: function(page){
                if (page.assets && page.assets.type) {
                    var user = server.current(ctx.session);
                    if(user){
                        var rxt = require('rxt');
                        var am = rxt.asset.createUserAssetManager(ctx.session,page.assets.type);
                        page.assetWithRxt = am.combineWithRxt(page.assets);
                    }
                }
            }
  1. Now your final asset.js file should something similar to this[1]
  2. Copy below content to a file asset.hbs in to [GREG_HOME]/repository/deployment/server/jaggeryapps/store/extensions/assets/restservice/themes/store/partials/

<script>
    var isSocial = ('{{features.social.enabled}}' == 'true');
</script>
<div class="asset-description">
    {{#with assets}}

       {{#with attributes}}
           <div class="asset-description-header">
               <div class="es-col-lg-12 col-lg-12 white-bg left">
                   <h3>{{../../rxt.singularLabel}} {{t "Details"}}</h3>
               </div>
           </div>
           <!-- asset details folder-->
           <div class="asset-details-header ">
               <!-- aset details -->
            <div class="col-xs-12 col-sm-12 col-md-5 col-lg-5 white-bg">
               <div class=" details-image white-bg">
                  {{> asset-thumbnail ..}}
               </div>
               <div class="details-container">
                   <div class="es-col-lg-12 col-lg-12">
                   {{> asset-details ..}}
                   </div>

               </div>

            </div>
               <!-- end of asset details-->
           </div>
           <div class="asset-details-wrapper ">
               <div class="white-bg padding-double">
                   {{> asset-utilization ../..}}
                   {{> asset-version-info ../..}}

               </div>
           </div><!-- description column-->
           <!-- asset description -->
               <div class="assetp-properties">

                   {{> view-asset-top-common-button-group ../.. }}

                   <ul class="es-nav nav es-nav-tabs nav-tabs" id="assetp-tabs" data-aid="{{../path}}">
                       <li id="asset-description" class="active">
                           <a href="#tab-properties" data-toggle="tab" data-type="basic">{{t "Description"}}</a>
                       </li>
                       {{#each ../../assetWithRxt/tables }}
                           {{#if_equal name "overview"}}
                           {{else}}
                           {{#if this.fields}}
                               <li id="asset-content-{{name}}">
                                   <a href="#tab-content-{{name}}" data-toggle="tab" data-type="basic">{{label}}</a>
                               </li>
                           {{/if}}
                           {{/if_equal}}
                       {{/each}}
                       <li id="user-reviews">
                           <a href="#tab-reviews" data-toggle="tab" data-type="comments">{{t "User Reviews"}}</a>
                       </li>
                   </ul>

                   <div class="tab-content">
                       <div class="tab-pane active" id="tab-properties">
                           <div class="content">
                               {{>overview ../..}}
                           </div>
                       </div>
                           {{#each ../../assetWithRxt/tables}}
                           {{#if_equal name "overview"}}
                           {{else}}
                               <div class="tab-pane" id="tab-content-{{name}}">
                                   <div class="content">
                                       <div>
                                           {{renderTablePreview .}}
                                       </div>
                                   </div>
                               </div>
                           {{/if_equal}}
                           {{/each}}

                       <div class="tab-pane" id="tab-reviews">
                            {{#if ../../features.social.enabled}}
                                   <iframe src='{{url ""}}/pages/user-reviews?target={{../../type}}:{{../../id}}&url-domain={{../../../features.social.keys.urlDomain}}' data-script='{{url ""}}/extensions/app/social-reviews/export-js/social.js' data-script-type="text/javascript" width="100%" height="100%" style="min-height: 500px;"></iframe>
                            {{/if}}
                           {{#if ../../inDashboard}}
                                <div id="comment-content" class="content"></div>
                           {{else}}
                               <div id="comment-content" class="content user-review"></div>
                           {{/if}}
                       </div>
                   </div>

               </div>
       {{/with}}
    {{/with}}
</div>
  1. For Later versions of WSO2 GREG product this asset.hbs may need to have slightly modified referring to its default asset.hbs file.
  2. Now restart the server. Login to Store and you can see several tabs when you goto a details page of a restservice.
  3. Click on each tab to see the corresponding table content.

    [1] https://github.com/ayshsandu/greg-store-details-extension-sample/blob/master/asset.js
Read More

Saturday, July 19, 2014

Removing Default Types from WSO2 Enterprise Store

WSO2ES shipped with default store items of types 'Gadgets','E-Books' and 'WebSites'.

When you are building your own store using wso2es, you may need to remove default items and related menus from both the store and publiser. Here's the guide to do this.

Removing from Store- Front Office
  • Delete unwanted <asset-type> folders from 
'ES_HOME/repository/deployment/server/jaggeryapps/store/extensions/assets/' directory.
  • Remove unwanted entries from 
'/ES_HOME/repository/deployment/server/jaggeryapps/store/config/store-tenant.json'
"assets": ["gadget", "site", "ebook"]
ex: if you need site only
    "assets": ["site"]
  • If you have started the server earlier, you will have to remove these entries from registry by editing '/_system/config/store/configs/store.json' using the management console.
  • Now remove the 
Removing from Publisher- Back Office
  • Delete unwanted <asset-type>.json's from
'/ES_HOME/repository/deployment/server/jaggeryapps/publisher/config/ext/' directory.
  • Edit following two code snippets of
'/ES_HOME/repository/deployment/server/jaggeryapps/publisher/config/publisher-tenant.json' to remove unwanted entries.
            
"collections": ["gadgets", "sites", "ebooks"]

ex: if you need site only
           "collections": ["sites"]

&
           "defaultAssets": {
                      "root":"/config/defaults",
                      "assetData": [{
                                                "type": "gadgets",
                                                "ignore":["agricultural-land", "intro-gadget-1", "intro-gadget-2", "gadget-template-explorer",  "gadget-explorer", "co2-emission", "electric-power",  "energy-use", "greenhouse-gas"]},
                      {
                        "type": "ebooks"},
                      {
                         "type": "sites" }]}

ex: if you need site only
           "defaultAssets": {
                      "root":"/config/defaults",
                      "assetData": [{"type": "sites"}]}
  • If you have started the server earlier, you will have to do the changes to registry by editing
'/_system/config/publisher/configs/publisher.json' using the management console.


  • Edit
'ES_HOME/repository/deployment/server/jaggeryapps/publisher/controllers/index_router.jag' to set the landing page to preferred asset-type.      
response.sendRedirect('/publisher/assets/gadget/');

ex: if you need site
            response.sendRedirect('/publisher/assets/site/');          
                      
Restart the server and here you go!
Read More
Designed ByBlogger Templates